Showing posts with label tutorial. Show all posts

Friday, September 20, 2013

*NEW* Happiness is You + Freebie!


Happy Friday Everyone! I'm glad that the weekend is finally here! Are you?

This week, I have a brand new collection for you called Happiness is You. This is definitely one of my favorites. Fancy Chalkboards are a hot trend right now. I'm thinking of putting one in my kitchen because I think they are so cool. So I've brought the fancy chalkboard look to the elements in this kit and paired the blacks and dark grays with bright orange, red, and yellows that just pop out in the LOs. The whole collection is 20% Off through 9/22. Save even more and grab the Bundle for 37% Off. You can get Happiness is You at Oscraps or my Personal Store.


CT LOs using Happiness is You


Want to get that chalkboard look?

 
I thought I'd give you some tools to get that chalkboard lettering look on your LOs. Whether you want to do your own title work or you want your journaling to look like it's written in chalk, there are a few simple tools you can have to make it quick and easy.
 
First, you need the right font. Here are a few of my favorites:


All these fonts are free for personal use at dafont.com (please check TOUs for commercial use).
 
Bergamot Ornaments - perfect for those special little flourishes!
 
Second, you need an awesome chalk style set to get the right look. Here are a few options at Sugar Hill Co. that will work nicely for this. I'm sure there are others out there as well!


It also easy to get colored chalk by merging your chalk style into your text and then clipping your color to it.
 
I also have a Happiness is You Border freebie that Joey made for you. Enjoy!


I'll see you next week!


Tuesday, June 4, 2013

Blending Tutorial by CT Emmy


Blending Photos into the Background Paper Tutorial

*To follow this tutorial one should have a working knowledge of Adobe Photoshop CS5. I am not sure how this translates into other programs or versions of programs.

This is my LO that this tutorial is based on:


 For me the blend is the last thing that I do on a page. Once my element placement, journaling and title work are done I can decide whether or not a blend will go well on the page or not. No matter when you add the blend to your page, the entire process is fairly simple. So, lets get started!

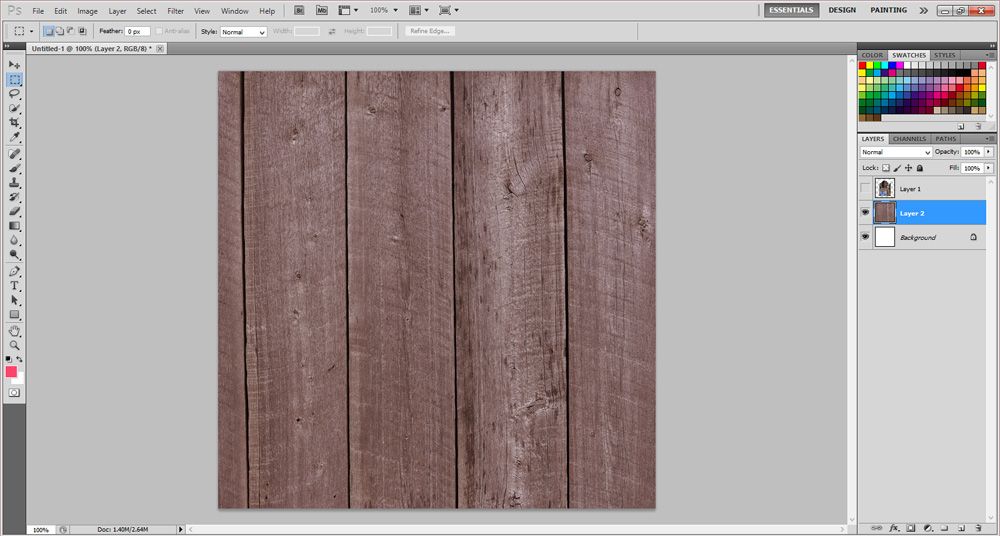
1. Open the paper of your choice. I am using the wood grain paper from Country Kitchen by Snips and Snails Designs this specific paper is found in the Country Kitchen Add-On.

 
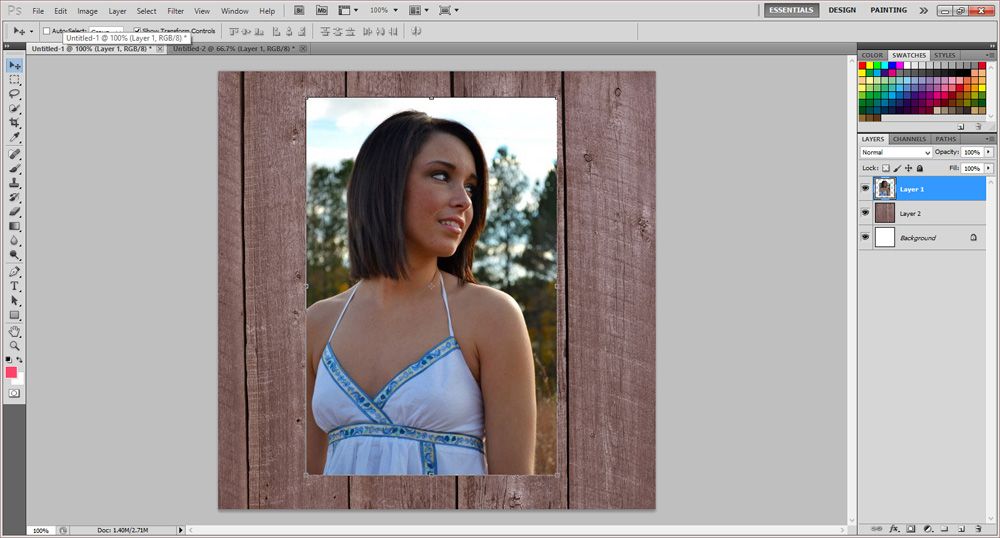
2. Pick a photo, preferably a good quality, large and one that is not too much of a close up.  Place it right on top of your paper layer and edit the photo to your liking.
 
 
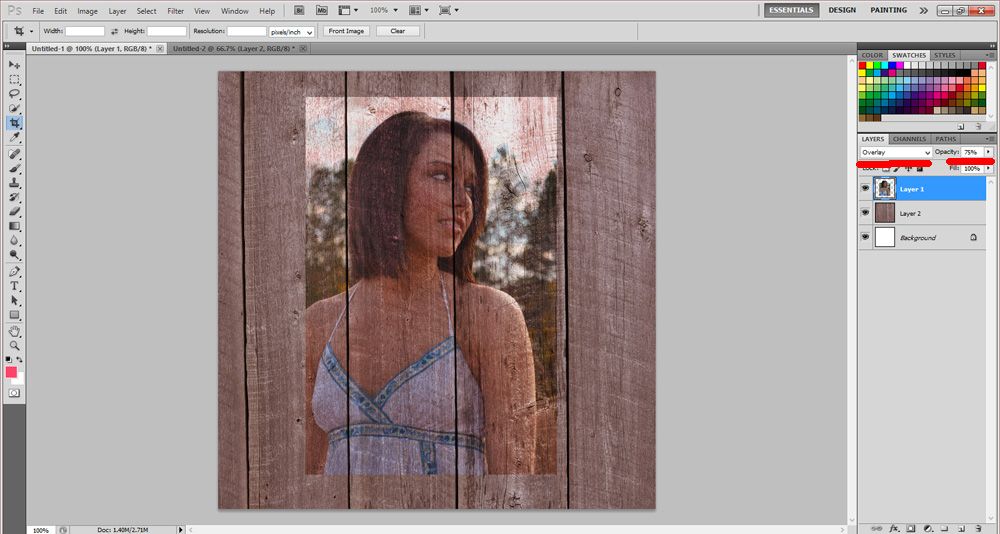
3. Change the blend mode of the photo. I am using Overlay for this tutorial but I have used Soft Light and Hard Light before depending on the effect that I am going for. Also, play with your opacity. Pick a setting that you like but don't make it too light. I usually use 75%. As you can see, this adds a very nice worn look to the paper and the photo. It blends it so nicely with the paper.
 
 
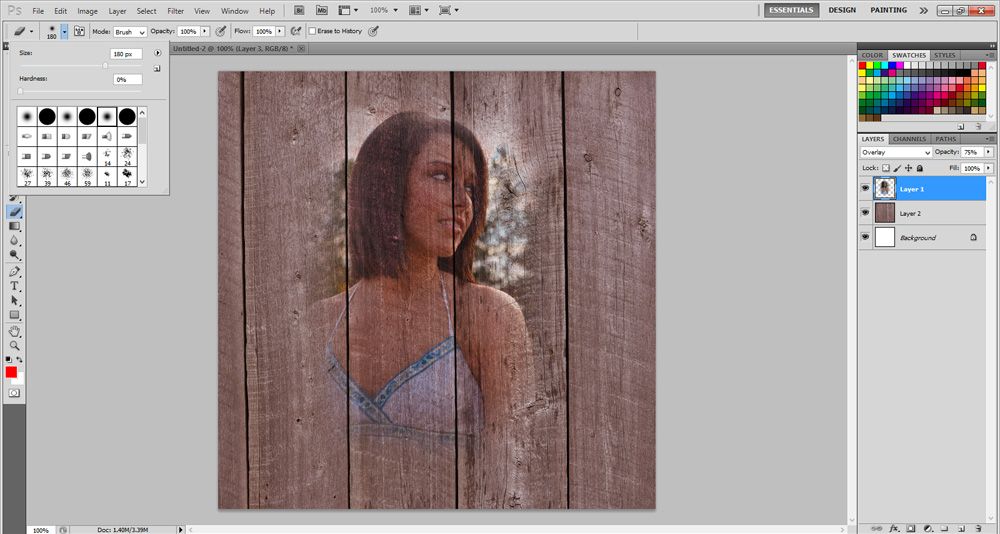
4. After this I take a low opacity brush and use it to take away all the hard edges from the photo. & Viola!


This is so easy and can add a really great touch to your layout!! I hope you learned something new and this was clear for you!
 
Emmy :)